Document scanning is often given little thought or consideration. A bit of planning and knowledge about how to approach it can really help the outcomes and make the process faster and more hassle free.
Scanner Choice
There are a huge number of scanners available on the market. Some are dedicated single function scanners while other are part of a multi-function device with a scanning function alongside printing and copying.
When making the choice of what scanner you want to use the three main factors affecting your decision are:
- Volume of documents you wish to process
- Your desired image quality level
- Budget
These three factors interact, with the “choose 2 out of 3” rule applying. Ie. if you want to process a large number of documents and achieve a good quality result be prepared to increase your budget. While if you want a good quality result but don’t need to process many documents you can get a high quality flatbed at a much lower cost than a high quality scanner with a document feeder.
Typically people choose to go somewhere in between or just go with a multifunction device with a scanning function. The main issue with this approach is that the decisions which lead to the purchasing of this device don’t always take the scanning function into consideration and you may be left with a solution which is poor in quality, poor for large volume scanning and also expensive. As such it’s highly recommended to focus just as much on the scanning function as functions such as printing and copying when buying these units.
When considering quality don’t just look at the numbers. Sure a 600 DPI scanner sounds twice as good as a 300 DPI scanner but just like photo cameras, the scanner’s CCDs (camera component) has many more factors that affect quality. The three primary quality differences you are likely to see between a good CCD and a bad one are:
• Accurate colour reproduction
• True levels of contrast
• Good border definition between coloured areas (e.g. the colour of text e.g. black on a white background)
For areas such as border definition and contrast, these can often be enhanced by quality scanning software which runs post-scanning enhancement processes on the images. Xtracta runs these to a limited degree (along with de-speckling, straightening etc.) however it’s best to let the scanning software do this. Colour reproduction can be enhanced by software but it just isn’t as good as having a good quality capture from the scanner. Often an older 2nd hand scanner with a high quality CCD will out perform a MFD, even if the MFD support twice the DPI.
When considering the processing volume, the obvious consideration is a flat bed versus a scanner with an automatic document feeder. For those that don’t know, document feeders allow multiple pieces of paper to be scanned together with the scanner “feeding” the pages through its sensor one by one. Document feeders are not created equal, while there are obvious metrics advertised such as the number of pages that can be held by the feeder, or whether the scanner can scan both front and back; the key consideration is the quality of its feeder mechanism. There isn’t much point of getting a scanner with a 100 page feeder capacity if it jams every 2nd document due to a poor quality feeder.
While we cover reducing the number of jams later in this blog post, it’s best to check the quality of the feeder for a prospective scanner purchase yourself. When at the showroom ask your sales consultant to demonstrate the feeder for you, preferably with a large volume of documents with some torn pages and others with strong fold lines. If you are looking at an MFD you can just hit the copy button to save setup time. It should become apparent which devices have good feeds and which do not. Remember to test with all the different paper types you will be using such as normal 200gsm copy paper, thermal paper, carbon paper etc.
Jams are not just to watch out for. The biggest concern we have is if there are undetected multifeeds – ie more than one page goes through the scanner at the same time. This will result in the page (or even pages if its really bad!) not being scanned without the user realizing it. Higher end scanners have multi-feed detection and will usually beep or stop the scanning process if they detect this situation. If your scanner doesn’t have this ability we recommend you watch every page that is scanned or do a quick count at the end of each batch.
Document Preparation
Getting documents ready for scanning is critical for getting a good result. Typically this process includes:
• Removing all staples, paper clips and other hard materials from the paper. This is absolutely vital as they will scratch the glass on the scanner and cause jams.
• Making sure that the edge being fed into the scanner is well formed and not ripped. Rips can cause paper to jam and it may be best to put these documents aside for individual or flatbed scanning.
• Unfold all pages and straighten as many folds as best you can. Sometimes it is necessary to lightly iron pages to weaken fold lines and allow better feeding.
• If pages are sticking together, rub them together a little bit to ensure they don’t stick and feed smoothly. Sometimes it is necessary to put a spacer copy paper page between them.
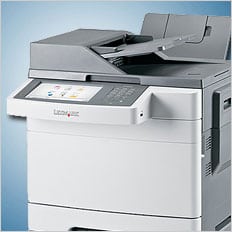
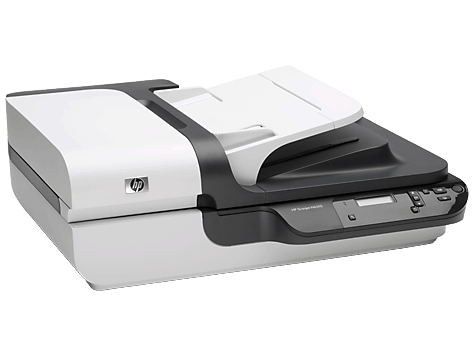
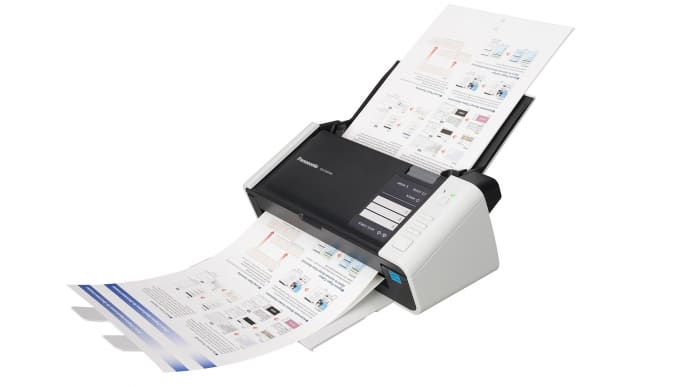
Interestingly, if you have a high quality document feeder on your scanner, having one page taped or glued to another can be successfully fed (e.g. receipts stuck to a blank A4 page or photographs taped onto light card). These work best with scanners which don’t have tight turns in their document feeder. E.g. in the images below one document feeder would be much better at handling these types of documents than the other.
Paper
There are many different grades of paper and these can sometimes led to difficulties with different scanners. This is primarily due to their document feeding system not working well with different paper types. Typically most documents you will be scanning are A4 200gsm copy paper which has a coarse texture. This is great paper for a roller to work with as it can get good friction with the paper yet the other types such as thermal paper or card can work differently. It’s best to consider and test this before purchasing your scanner or if you already have a scanner, learn how different types feed and group them together or use a flat bed where required.
Scanning Process
Now you have chosen your scanner, prepared your documents and considered your paper it’s time to start scanning! If using a flatbed make sure that the edge of the paper is flush aligned with the position guide on the scanner before proceeding. If using a document feeder, first decide on the orientation of your documents – often, especially if some edges are torn it’s best to put the strongest, straightest edge against the feeder and either rotate the images in software or use Xtracta’s auto detect+rotate feature to ensure correct document orientation. By doing this you are less likely to have a jam and frustrations.
Make sure to develop a system to keep track of what documents have and hasn’t been scanned. Often running “batches” through the feeder together and keeping these wrapper in rubber bands helps – don’t be afraid to use post it notes to keep track of each batch’s status.
Scanner Maintenance
Making sure your scanner is in top shape is critical for you to get a good result. Typically the 2 most likely issues you are likely to encounter are worn rollers (which feed documents through the scanner) or dirty/scratched glass. Worn rollers are relatively easy to detect as it is likely your scanner won’t be able to feed properly and report a jam more often than normal. Sometimes simply cleaning the rollers with a damp cloth can remove dirt build up otherwise replacing them with new rollers can help also. Most manufacturer will sell you replacements for a few dollars and it’s worth having a few spare.
We also suggest that you clean the glass relatively often to ensure as few marks are picked up as possible. While a damp cloth can suffice for glass, water will typically leave a watermark and thus it would have to be buffed by a lint free cloth to remove these. Alternatively we suggest using isopropyl alcohol to clean the glass alongside a lint free cloth. This alcohol is very effective at cleaning and will also evaporate leaving no water stains on the glass.
Here at Xtracta we process thousands of scanned pages every day and see the good, the bad and the ugly. It’s often interesting to talk to clients and see how their approach to scanner selection, document preparation and maintenance has a direct result on the quality of their images. While we don’t often see this, partly in thanks to our advanced OCR engine, the quality of a scanned image can affect the accuracy of data extraction. We thus strongly suggest that quality is the number one priority for our scanner users.


testing – Graham